Manually Processing Documents
The Manual Process Stage for Rejected Documents constitutes a pivotal phase within our product, addressing scenarios where documents fail to meet defined validations or Region of Interest (ROI) criteria. This comprehensive documentation serves as a guide to proficiently navigate the manual process stage and manually handle and process rejected documents.
The Manual Process Stage for Rejected Documents presents users with an essential solution to manage rejected documents that deviate from specified validations or ROI parameters. By leveraging this module, users can effectively process rejected documents manually, ensuring accurate data extraction and alignment.
Key Features of the Manual Process Stage for Rejected Documents
The Manual Process Stage for Rejected Documents encompasses the following key features:
Document Rejection Handling: The module enables users to address rejected documents that do not match defined validations or ROI.
Manual Processing: Users can manually handle and process rejected documents further to achieve accurate data extraction.
Note:
If you encounter any issues, contact your system administrator.
Accessing manual handling page
To access the manual handling page, follow these steps:
-
In the main menu, under Documents Processing, click Manual Process. The Manual Handling page opens.

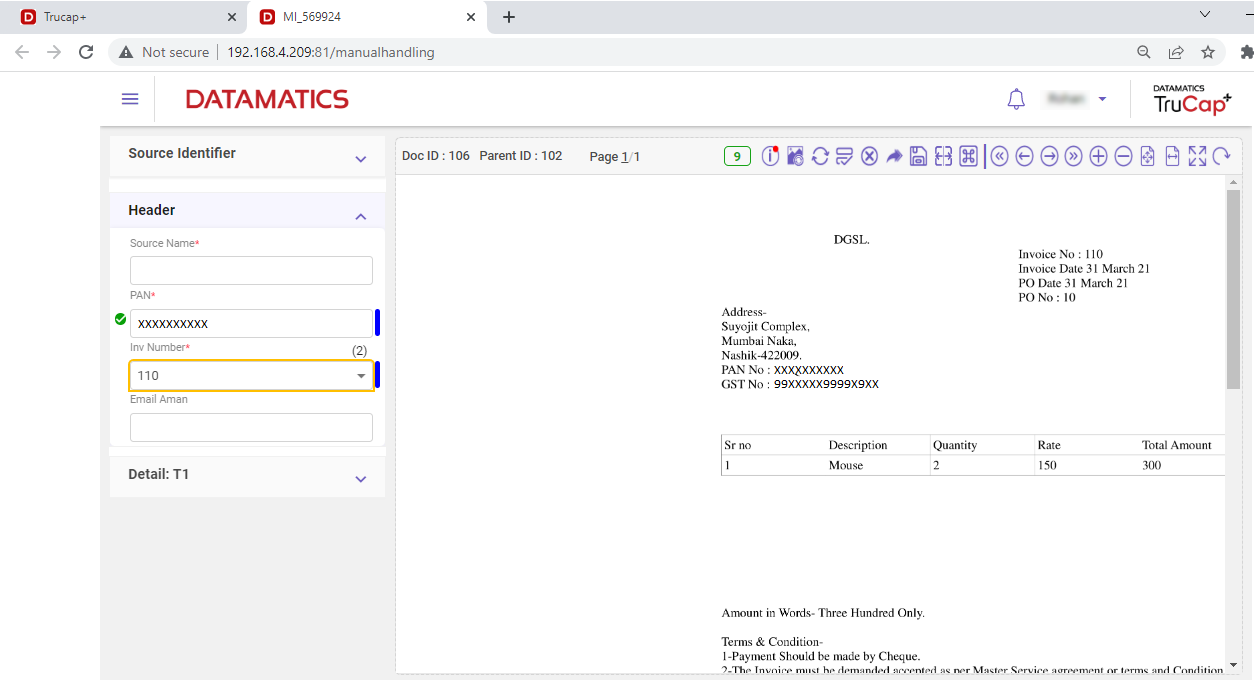
During the data extraction process, if the information related to an ontology field is present in the database, it will be directly fetched from the database. The Knowledge master enables you to maintain information related to documents in a database. More For the incomplete field details, you can click and capture the required data on the appropriate fields, and there may be instances where some details do not get captured by click and capture; in such cases, you need to enter the details manually until you find the green tick
 icon.
Note:
In the case of multiple documents, the auto splitter splits them based on the document classification or the splitter field mentioned in the ontology.
Suppose the document is not split into the correct pair and is sent to MI. The user can identify if it has arrived after splitting by looking for the parent document id (if available) mentioned in brackets, as shown below.

Understanding the manual handling UI
TruCap+ includes several colors indicating elements to help detect the errors which require manual intervention on the Manual handling page.
The colour indication is the field outline/band color for textbox/dropdown reflected in MI/QC. The user can customize the color of his choice by configuring the settings under the MI field background colour section of the Application settings section.
The MI page is divided in to 4 sections — Source Identifier (optional), Header, Detail (table), and Footer. The colour indications explained are common for all 4 sections.
Source identifier
The source identifier feature enables the user to identify business keywords and update the source key field table that leads to document source identification. It allows the application to lookup for source-specific information in the source key field table. If the information is available, it is used to auto-populate the ontology fields as per the requirements.
Note
The Source Identifier panel will be displayed on MI only if the subtype has a field of Source Name type and source identifiers attributes are selected in the ontology. Both conditions need to be satisfied to display the source identifier panel on MI.
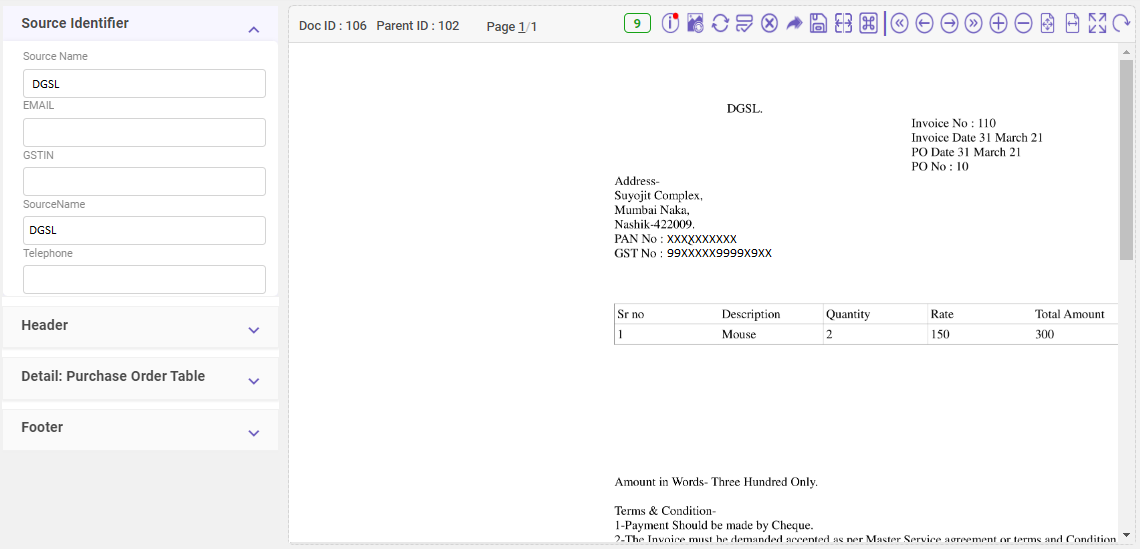
Once the user identifies and saves the unique keywords, these keywords are visible on the Review Source Identifier page. The user can check if correct and accept the keyword, which gets added to the source key field table.
Header
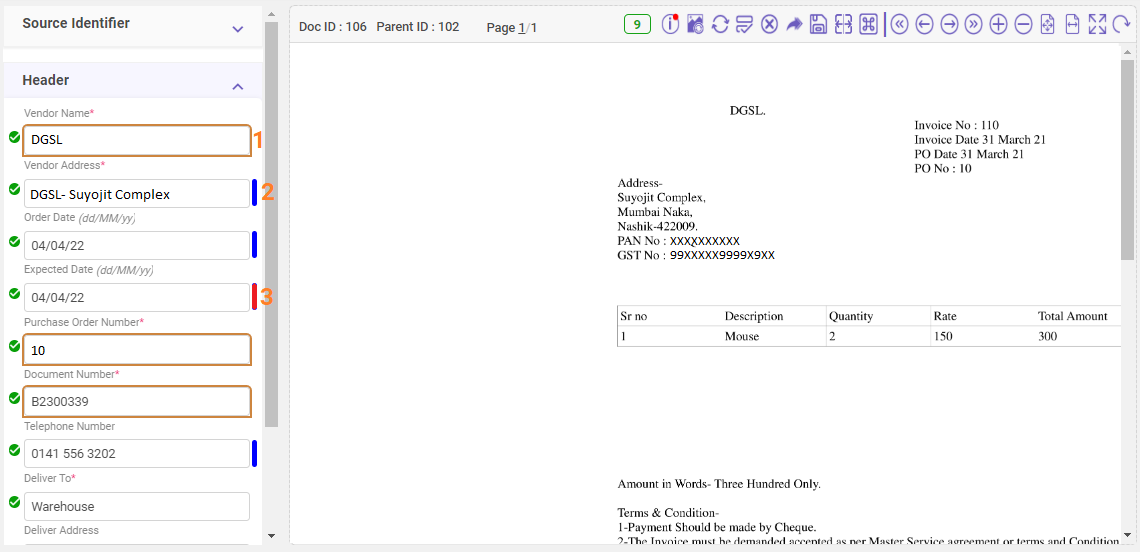
Refer the table below to read the callout descriptions.
|
# |
DESCRIPTION |
|---|---|
|
1 |
Displays the customized field background colour. |
|
2 |
Blue line appears when the extracted confidence level is greater or equal to the defined ontology. |
|
3 |
Red line appears when the extracted confidence level is lesser than the defined ontology. |
Detail (Table)
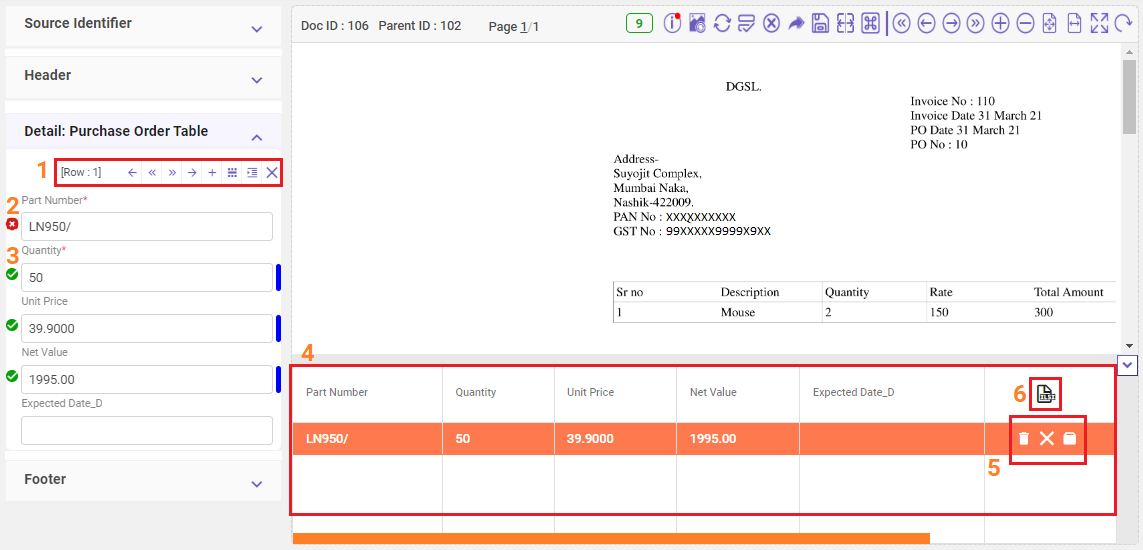
Refer the table below to read the callout descriptions.
|
# |
DESCRIPTION |
|---|---|
|
1 |
Hover-over the above image to know about the available features. Note:
|
|
2 |
Red cross mark indicates that the defined validations and field options (ontology) for the specific field has failed. |
|
3 |
Green tick mark indicates that the defined validations and field options (ontology) for the specific field has successfully passed. |
|
4 |
Creates table as per the fields added under Detail section. |
|
5 |
You can use the Delete icon to delete the row, Clear icon to clear the field details and Copy to ClipBoard icon to copy the table to clipboard. |
|
6 |
You can click the Export icon to export all the data. |

 icon is only visible if a field includes table sum method.
 icon is only visible if a field includes computed data which is not generated from extraction.
Extracted text information
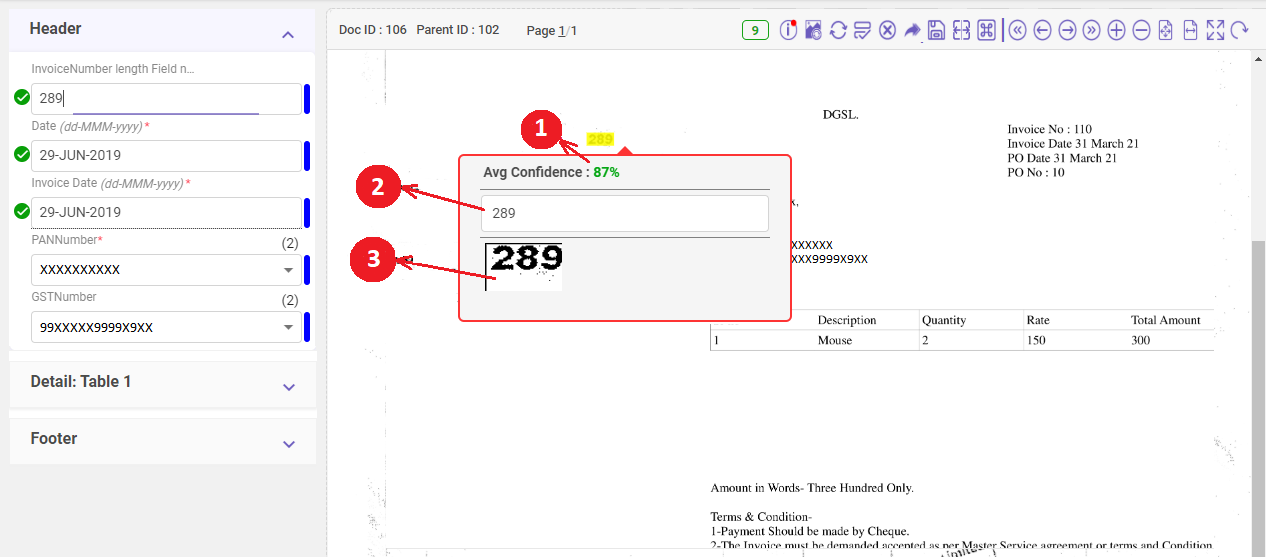
The following table displays the information about the extracted text.
|
# |
DESCRIPTION |
|---|---|
|
1 |
Displays the total average confidence value for the field name. |
|
2 |
Displays the extracted OCR text which can be modified and the same value gets reflected on the extracted field value that is displayed under Header section. In the case of multi-line text, the extracted text pop-up can accommodate a maximum of 3 lines; a scroll bar is visible if the extracted text exceeds 3 lines. |
|
3 |
This feature zooms out the field detail appearing on the page for better readability. |
Extracting table
To extract the table data from the document, click the mark ROI icon  and mark the table area in the document, and then click the extract table icon
 .
Footer
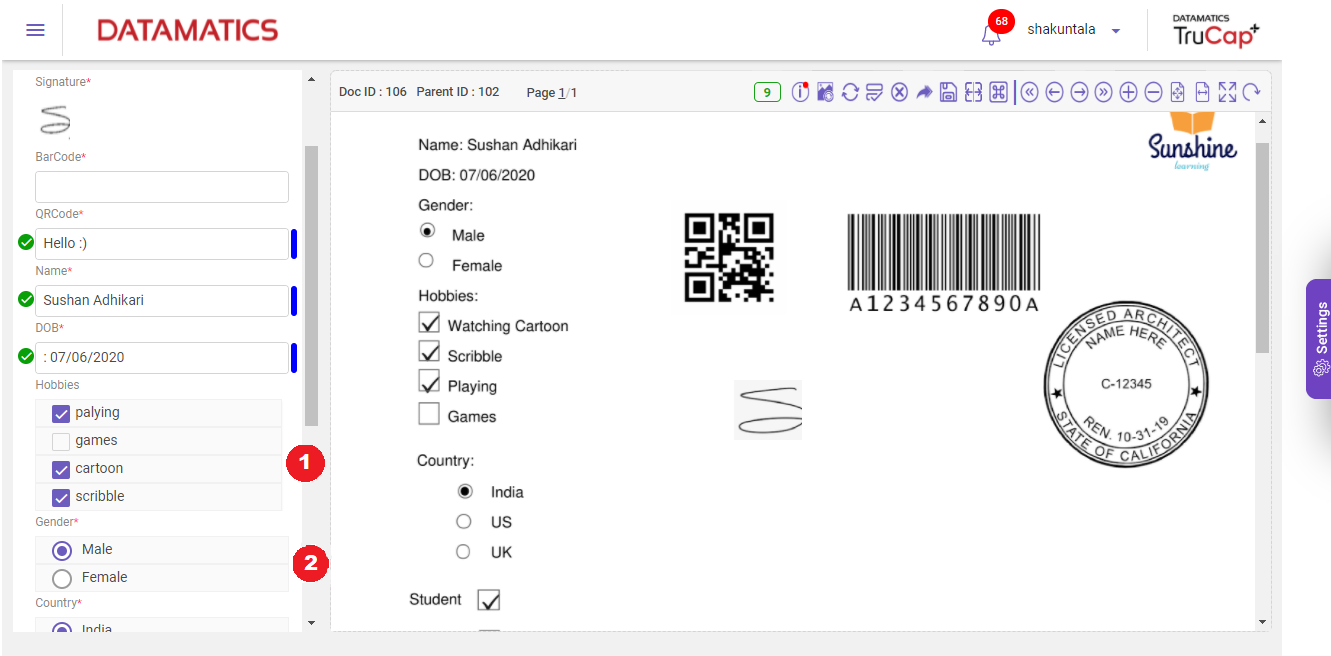
Refer the table below to read the callout descriptions.
|
# |
DESCRIPTION |
|---|---|
|
1 |
Displays the list of extracted values. User can now select the required option in case the extracted value does not match with the information present in the document. Note: A calculate |
|
2 |
Displays the list of extracted options. User can now select the required option in case the extracted value does not match with the information present in the document. |
Quick access toolbar
The below image explains some handy tools available on the upper-right corner of the Manual Handling page.

Hover-over the above image to know about the available features.
Click on the individual drop-downs for a detailed explanation of the available features.
How to check readability score?
Hover over the Readability score  icon to view the readability score
 of the displayed document. The readability score of the same document can also be viewed on Document monitor page under readability score column.
Note: The number displayed on the readability score icon will vary depending on the readability score of the document displayed on the MI screen.
Warning
Hover over the Warning  icon to view document-related information (as shown in below image).

The top line displays the category || project || subtype to which the document displayed on the MI screen belongs. The bottom line displays the message.
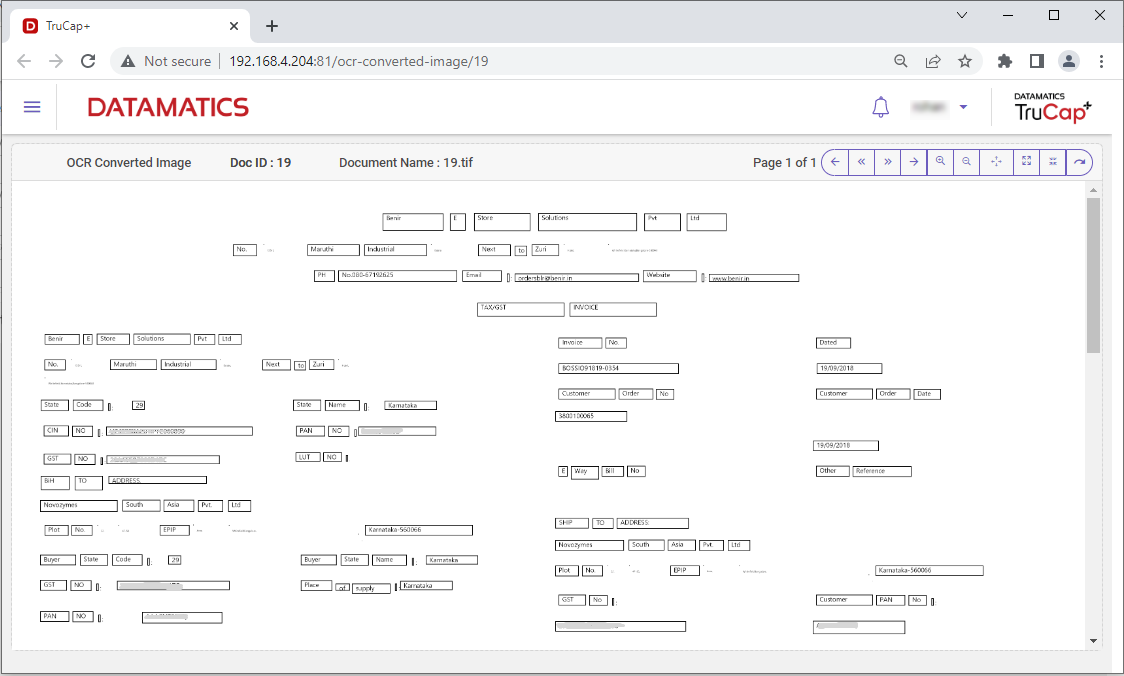
How to view OCR converted image?
Click the  icon to view the OCR converted image in a separate tab (see below).
The below image explains some handy tools available on the upper-right corner of the page.

Hover-over the above image to know about the available features.
How to cancel changes?
Click the  icon to reset any changes. The Cancel changes? pop-up opens. Click OK to reset any changes done on the MI screen.
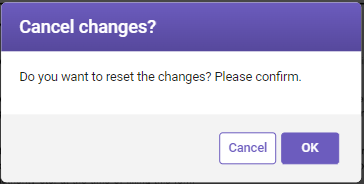
Once you click OK, the same document is displayed on the MI screen with reset changes.
How to partially save documents?
Click the  icon to partially save the changes made in the document on the MI screen. Once you click this icon, a message Document partially save successfully. is displayed at the top of the MI page.
How to discard documents?
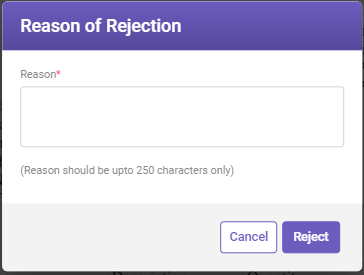
You can also reject any document by clicking the Reject  icon, which can be viewed on Operations dashboard under rejected column. When you click the Reject icon, the Reason of Rejection window opens. Specify the reason in the Reason field for rejecting the document and then click Reject.
Note:
-
If a user is assigned a role that has delete permissions check marked for Manual Process and Quality Check, then that user can reject a document.
-
The reason for rejection specified is displayed in the Document Monitor screen when the current stage is shown as Document discarded.
How to Forward documents?
To forward the document, perform the following steps.
-
Click the Forward
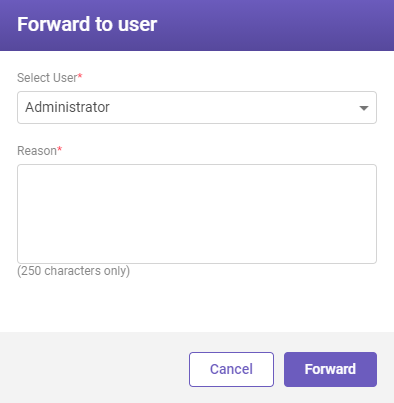
 icon to forward the document. The Forward to user window opens.

-
Select the user to whom the document is to be forwarded from the Select User drop-down list. Also, specify reason in the Reasonfield, and then click Forward to forward the document to the selected user.
How to save documents?
If the documents are accurate, click the Save icon to move the documents to the next stage of exporting.
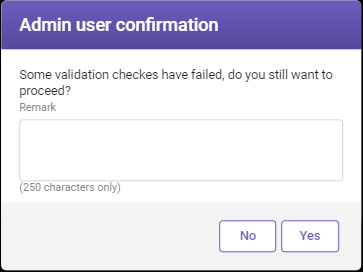
When you click Save, an option to choose if a particular document has to be moved to Quality Check with or without executing validations on saved fields is available. If you click Yes, the document gets saved with validation execution i.e. only after all the fields are successfully validated.
If any field validation fails, the Admin User Confirmation pop-up is displayed, prompting to provide input on whether to proceed to save the document with failed validations.
For Super user
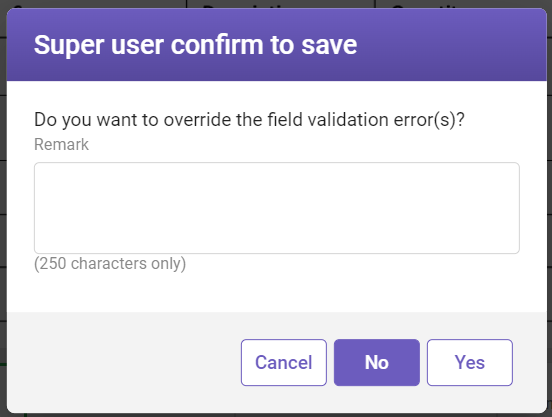
If a user has Super user permissions granted, the Super user confirm to save pop-up is displayed, prompting to provide his input on whether the super user wants to override the field validation errors.
For Plain user (not Super user)
For plain user, the data is validated before saving the document. If the validation fails, user gets a notification message Field validation failed. Please correct the field values. The document is not saved.
How to send documents to splitter?
Any document that has not been appropriately split and is in the manual process stage, a user can send that document for a manual split.
When you click the Send to splitter icon, the following window opens.
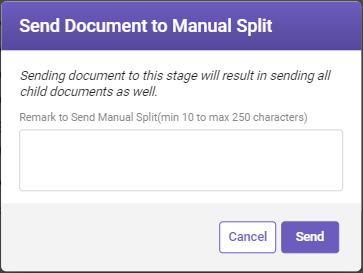
Remark to Send Manual Split: Specify the remarks if required, and then click Send .
Hot keys
To access hotkeys, click the  icon on upper-right corner of the Manual Process/Quality Check page. Following is the list of hotkeys:
|
HOTKEYS |
DESCRIPTION |
|---|---|
|
Alt+A |
Actual Size |
|
Alt+C |
Cancel Button |
|
Alt+DOWN_ARROW |
Previous row data for table |
|
Alt+I |
Zoom In document |
|
Alt+K |
Open Hot Keys pop-over |
|
Alt+M |
Send Document to Splitter |
|
Alt+O |
Zoom Out document page |
|
Alt+P |
Fit to Page |
|
Alt+PgDn Key |
Go to Last page of document |
|
Alt+PgUp Key |
Go to First page of document |
|
Alt+Plus |
Add new row data for table |
|
Alt+Q |
QC Save Button |
|
Alt+R |
Rotate Image |
|
Alt+S |
Save Button |
|
Alt+U |
Forward to User Button |
|
Alt+UP_ARROW |
Next row data for table |
|
Alt+V |
Display Validation Pop-up for current field |
|
Alt+W |
Fit to Width |
|
Ctrl+Alt+D |
Discard Button |
|
Ctrl+Alt+H |
Go to Header Section |
|
Ctrl+Alt+F |
Go to Footer Section |
|
Ctrl+Alt+T |
Go to First Table Section |
|
Ctrl+LEFT_ARROW key |
Go to Previous page of document |
|
Ctrl+RIGHT_ARROW key |
Go to Next page of document |
Page navigation

With the above section of the quick access toolbar, you can use the features available to navigate the document, or to change the size of the displayed document, or to rotate the document.
Accessing MI page settings
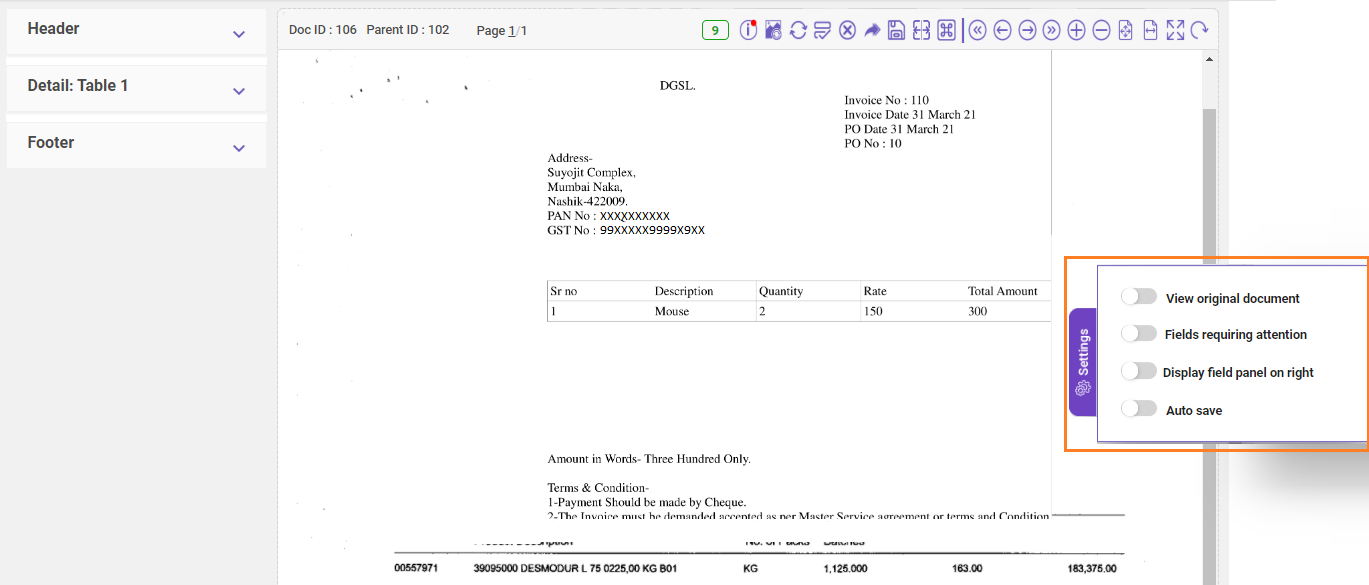
On the right side of the Manual Handling page, when you click the settings  icon, the following four toggle switch are displayed.
-
View original document: The images displayed on the MI page are processed images. To view the original image, turn on the View original document toggle switch.
-
Fields requiring attention: Turn on to use the TAB button functionality for the affected fields on MI and QC page. Turn off to use the TAB button as a default functionality for all the fields. The Tab button setting is applicable at a user level. Based on the requirement, any user can turn on to use the functionality.
Note:
During the manual intervention, based on the Fields requiring attention setting, the default cursor position gets focused on the affected field, which needs a priority check. The cursor gets focused in a sequential order depending on the number of affected fields.
Users can use the TAB button to move to the next suspicious field. This feature is applicable for Header, Detail (In the case of Table, default cursor position navigates to the next row), and Footer. The field is considered suspicious in the following scenarios:
-
When any mandatory field is blank
-
When any field had been set as "Stop and confirm" under ontology
-
When there is any multi-suspected field
-
When the validation has failed for any particular field
-
When any field had been set as "Must Focus" under ontology
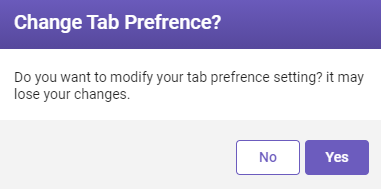
When you enable the Fields requiring attention toggle switch, the Change Tab Preference? dialog box opens.

Click Yes to modify tab preference setting.
-
-
Display field panel on right: On clicking this toggle switch, the left side panel, which contains Header, Detail, and Footer tabs, moves to the right side of the screen. It is a one-time setting.
-
Auto Save: If the user enables this toggle switch, the document gets automatically saved after a set time. Refer auto save time under Manual Intervention settings.
NEXT
Now that you have manually processed a document, let's quality check it.